
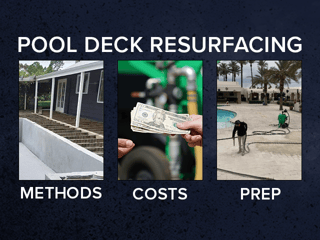
Pool decks are a popular outdoor feature that provides a comfortable and safe space for relaxation and entertainment. Over time, pool deck surfaces may become damaged, stained, or worn out due to constant exposure to water, sunlight, and harsh weather conditions. Resurfacing is an effective way to restore the look and functionality of a pool deck. In this post, we will discuss some of the most common pool deck resurfacing methods and the pros and cons of each. However before we can get into these types, we need to know how to prepare fo resurfacing.
Pool Deck Resurfacing With DUSTLESS BLASTING
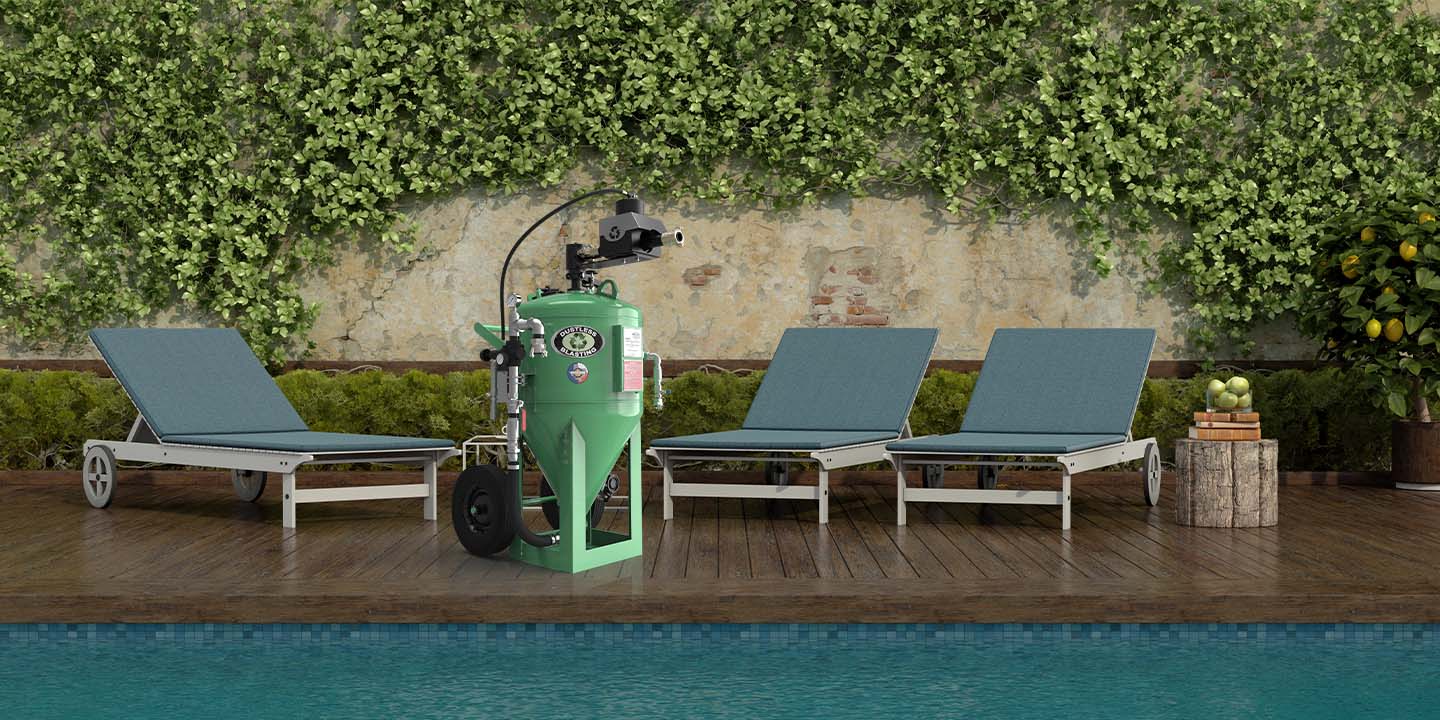
the key to all resurfacing prep
No matter the kind of pool deck you are working with, step one of the resurfacing process is the same: thoroughly clean and prep the surface. There are a few ways that you can go about this. Some of the most common methods are sanding or grinding the surface. While this will work, both sanding and grinding can be time-consuming and labor-intensive. Sanding requires the use of sandpaper or other abrasives to manually remove the old coating and create a rough texture. Grinding uses a machine to grind down the surface of the pool deck. These processes will increase labor costs and can take a long time to complete - especially for larger pool decks.
On top of that, both methods can create a significant amount of dust and debris. This dust can be harmful if inhaled as concrete pool decks contain silica sand that is known to cause health issues if inhaled. The dust can also be difficult to contain, and can make cleanup after the preparation process more difficult and time-consuming.
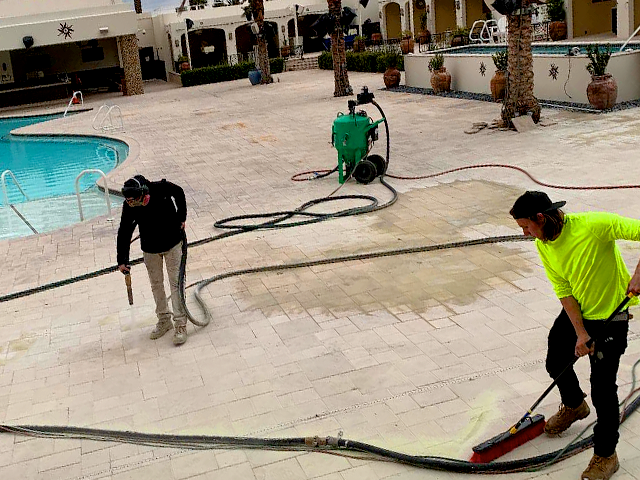
For a quick and efficient way to remove old coatings, stains, and debris from your pool deck while ensuring worker safety, Dustless Blasting is the solution you've been searching for. This innovative method uses a mixture of water and abrasive media to minimize dust by 90%, making it the perfect tool for preparing surfaces in the beginning stages of your resurfacing project.
Dustless Blasting has emerged as a superior alternative to power washing for preparing pool decks. Not only does it produce less water runoff, but its adjustable blast stream pressure can also create a rougher texture for a better bonding surface. This ensures a longer-lasting finish that can withstand the test of time.
To achieve a flawless pool deck, selecting the right tools is imperative. When it comes to preparing the surface for a fresh finish, Dustless Blasting is the ultimate method that delivers exceptional results.
Concrete Overlay
Resurfacing Method
Using a concrete overlay is a popular and cost-effective method for pool decks. It's a great way to give a backyard oasis a fresh new look without breaking the bank. The process involves pouring a thin layer of concrete over the existing surface, which can then be customized with various colors, patterns, and textures to achieve a unique and personalized look.
While a concrete overlay provides exceptional durability, it's important to remember that it can only be applied to a surface that is in good condition. This requires proper surface preparation, which includes removing failing paint, repairing any cracks or damage and thoroughly cleaning the area. Additionally, over time, shifting soil or wear and tear may cause cracking, so regular maintenance is crucial to maintain its appearance. Nevertheless, due to its affordability and versatility, concrete overlay is still a popular choice for pool decks. To resurface your concrete overlay pool deck, follow these steps.
-
Prepare the pool deck surface: Remove any furniture or debris from the pool deck and clean the surface thoroughly. Using a Dustless Blasting machine will speed up this process!
-
Repair any cracks or damage: Fill in any cracks or holes in the pool deck using a concrete patching compound. Smooth the surface of the patch and allow it to dry completely before proceeding.
-
Apply a bonding agent: Apply a concrete bonding agent to the pool deck surface to ensure good adhesion of the overlay material. Follow the manufacturer's instructions for application and drying time.
-
Mix and apply the overlay material: Mix the overlay material according to the manufacturer's instructions. Apply the material to the pool deck surface using a trowel or squeegee. Smooth the surface of the overlay material as you apply it, being careful to maintain a consistent thickness throughout the area.
-
Add texture or color: If desired, add texture or color to the overlay material while it is still wet. This can be done using tools such as a broom, trowel, or roller. Follow the manufacturer's instructions for any additional steps required to achieve the desired texture or color.
-
Allow to dry: Allow the overlay material to dry completely before allowing any foot traffic or furniture to be placed on the pool deck. Follow the manufacturer's instructions for drying time.
-
Seal the surface: Apply a concrete sealer to the pool deck surface to protect the overlay material from water and sun damage. Follow the manufacturer's instructions for application and drying time.
Concrete Patio Resurfacing Cost
The cost of a concrete overlay typically ranges from $3 to $10 per square foot, depending on the type of overlay used, the level of customization required, and the complexity of the installation. In addition to the cost of the overlay, you may also need to consider the cost of surface preparation, which can include cleaning, repairing, stripping failing paint and priming the existing surface.
It's always a good idea to get a few quotes from professional contractors to get a better idea of the cost of applying a concrete overlay to your pool deck. They can assess your pool deck, provide recommendations, and give you a more accurate estimate based on your specific needs and preferences.
Stamped Concrete Pool Decks
Resurfacing Method
Stamped concrete is a highly versatile material for pool decks, as it can mimic the look of various materials such as natural stone, brick, or tile. This means that homeowners can achieve a high-end look without the high-end cost. Stamped concrete also offers a non-slip surface, which is especially important around a pool area where wet surfaces can be hazardous. Another advantage of stamped concrete is its durability, as it can withstand harsh weather conditions and heavy foot traffic.
The cost of stamped concrete can be higher than some other pool decks due to the additional labor and materials involved. Additionally, the color options are limited to the concrete mix used, which may not provide the exact shade or hue desired. Regular maintenance is also crucial to prevent fading, cracking, or chipping over time. Stamped concrete still remains a popular choice for pool decks due to its customization options and durability.
-
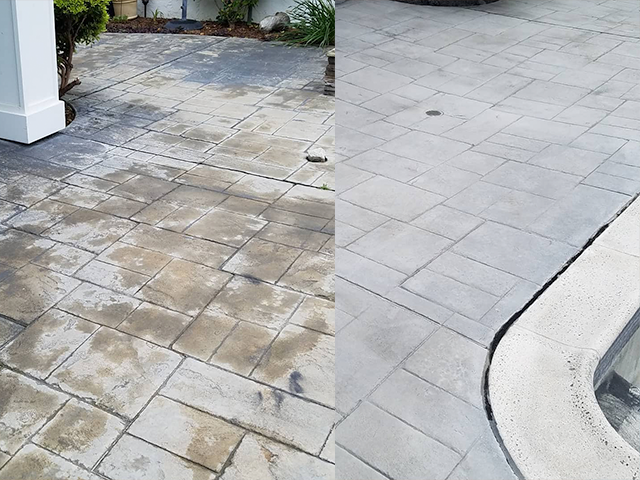
Clean the surface: The fastest way to give your surface a quick cleaning that will remove any dirt and debris as well as clear up tough stains is by using the Dustless Blaster. Once cleaned, allow the surface to dry completely before proceeding. See the photo below for a before and after picture of a stamped concrete patio cleaned with Dustless Blasting equipment.
-
Repair any cracks or damage: Inspect the surface for any cracks or damage and repair as necessary. Use a concrete patching compound to fill in any cracks or holes. Allow the compound to dry completely before proceeding.
-
Apply the resurfacing material: Choose a concrete resurfacer that is designed for use on pool decks. Mix the resurfacer according to the manufacturer's instructions and apply it to the surface using a trowel or squeegee. Work in small sections and be sure to apply the resurfacer evenly.
-
Stamp the surface: Once the resurfacer has been applied, you can use stamps to create a decorative pattern on the surface. Follow the manufacturer's instructions for stamping.
-
Allow the surface to dry: Allow the resurfacer to dry completely according to the manufacturer's instructions. This may take several days, depending on the weather conditions.
-
Seal the surface: Once the surface is completely dry, you should apply a sealer to protect the surface and enhance its appearance. Choose a sealer that is designed for use on pool decks.
Cost
The cost of concrete stamping for pool deck resurfacing will depend on several factors such as the size of the pool deck, the complexity of the stamping pattern, the type of coloring and finish used, and the cost of labor in your area. Generally, concrete stamping can be more expensive than other pool deck resurfacing options like simple concrete overlays, but it offers a highly customized and decorative look that can greatly enhance the appearance of your pool area
The cost of concrete stamping typically ranges from $8 to $15 per square foot, depending on the factors mentioned above. This can vary widely depending on your location and the contractor you choose, so it's important to get multiple quotes and compare them to find the best value for your budget.
Pavers Pool Decks
Pool Pavers Resurfacing Method
Pavers are an increasingly popular choice for resurfacing pool decks. They consist of interlocking concrete or natural stone blocks that create a visually pleasing and slip-resistant surface. Pavers have numerous advantages, including their wide range of colors, textures, and patterns to choose from, as well as their durability and resistance to cracking and fading. Additionally, if a single paver becomes damaged, it is easy to replace it without having to redo the entire surface. Pavers are also low maintenance, which is a bonus for homeowners.
However, there are also some disadvantages to using pavers for pool deck resurfacing. One significant drawback is their expense compared to other resurfacing methods. Additionally, the installation process can be time-consuming and labor-intensive, which may make them impractical for some people. Finally, if the pavers are not installed with a proper slope for drainage, they can become slippery when wet, which can be a safety hazard.
-
Clean the surface: Before starting the resurfacing process, it is important to clean the surface thoroughly. Sweep the surface to remove any loose dirt, debris, and leaves. You can also use a Dustless Blasting machine to quickly remove any stains, paint or hard to clean areas. Below is a photo (mid project) of pavers being cleaned and stripped of old paint by a Dustless Blaster.
-
Repair any damage: Check the pavers for any damage or cracks. If you find any, use a chisel and hammer to remove the damaged paver and replace it with a new one. Also, fill in any gaps or cracks with a jointing sand or mortar.
-
Apply a bonding agent: Once the pavers are clean and repaired, apply a bonding agent to the surface. This will help the new layer of resurfacer to adhere better to the pavers. You can use a brush or roller to apply the bonding agent.
-
Mix and apply the resurfacer: Mix the resurfacer according to the manufacturer's instructions. Use a trowel to spread the resurfacer evenly over the pavers. Work in small sections to ensure that the resurfacer is spread evenly.
-
Smooth out the surface: Use a long-handled squeegee to smooth out the resurfacer and remove any excess. Make sure that the resurfacer is spread evenly and does not have any bumps or ridges.
-
Let it dry: Let the resurfacer dry for at least 24 hours before walking on it. Avoid getting any water on the surface during this time.
-
Apply a sealer: Once the resurfacer is dry, apply a sealer to protect the surface from the elements. You can use a roller to apply the sealer evenly over the surface. Let it dry for at least 24 hours before using the pool.
COST
Using pavers to resurface your pool deck can be a more expensive option than other resurfacing methods like concrete overlays or coatings. The cost of pavers can vary widely depending on the material, size, and style you choose. Common paver materials include concrete, brick, and natural stone, with prices ranging from $2 to $30 or more per square foot. Higher-end materials like natural stone tend to be more expensive than concrete or brick.
In addition to the cost of the pavers themselves, you will also need to consider the cost of installation. The cost of labor can vary depending on the complexity of the installation and the cost of living in your area, but you can expect to pay around $5 to $10 per square foot for installation. Overall, the cost of using pavers to resurface your pool deck can range from $10 to $40 or more per square foot.
Tile Pool DECKS
Resurfacing Method
Pool deck tile resurfacing is a popular option for homeowners who want to update the look of their pool area. Tiles are available in a variety of materials such as ceramic, porcelain, glass, and natural stone, making them a versatile choice. One of the benefits of using tiles for pool deck resurfacing is their durability and resistance to water, sun, and pool chemicals. Additionally, tiles come in a wide range of colors, patterns, and textures, allowing for a personalized and unique look. They are also easy to clean and maintain, making them a low-maintenance option for busy homeowners.
However, there are also some disadvantages to using tiles for pool deck resurfacing. Firstly, tiles can be expensive, depending on the type of material and design selected. Grout lines can also become a breeding ground for mold and mildew if not maintained properly, which can be a health hazard. Tiles also need an anti-slip coating or texture to be added to prevent slips and falls.
-
Assess the condition of the pool deck: Check for any cracks, chips, or loose tiles that need to be repaired before resurfacing. Remove any debris from the surface and clean the area thoroughly. Below is a before and after photo of tile cleaned by Dustless Blasting equipment with pressure settings modified for delicate tiles.

-
Choose the resurfacing material: Select a material that is suitable for your pool deck, such as concrete, epoxy, or rubber. Consider the durability, slip-resistance, and color options of the material before making a decision.
-
Prepare the surface: Use a Dustless Blasting machine to remove any dirt, grime, or loose material from the pool deck. Allow the surface to dry completely. You can also adjust the pressure of the blast pot to roughen the surface a bit, which will help the adhesion of the primer in the next step.
-
Apply the primer: Apply a primer coat to the surface to ensure proper adhesion of the resurfacing material. Allow the primer to dry for at least 24 hours.
-
Apply the resurfacing material: Apply the resurfacing material in sections, using a trowel to spread it evenly over the surface. Work in small areas to ensure that the material doesn't dry out before it can be spread. If using multiple colors or patterns, apply them as per the design requirements.
-
Add texture: Create a non-slip texture by using a broom or other tool to rough up the surface while the resurfacing material is still wet.
-
Allow the surface to cure: Let the surface dry for at least 24 hours before walking on it, and up to several days before using the pool.
-
Apply a sealant: Apply a sealant to the surface to protect it from damage and prolong its lifespan.
COST
The cost of tile resurfacing for a pool deck can vary depending on various factors such as the size of the pool, the type of tiles being used, and the labor costs in your area. In general, tile resurfacing can be more expensive than other resurfacing methods such as concrete or epoxy coating.
Additionally, the cost may also depend on the condition of the existing pool deck surface. If there is extensive damage or underlying issues that need to be addressed before the tile resurfacing can take place, this can also increase the overall cost.
The Pool Deck RESURFACING MVP
With Dustless Blasting by your side, you can ensure a hassle-free resurfacing process for any pool deck material. There isn't another tool on the market that can make the key parts of your resurfacing process go as smoothly and efficiently.
For a detailed look at how Dustless Blasting helped one pool owner in need, check out this case study! Or if you want to read more about how Dustless Blasting can help your pool, check out our dedicated pool restoration page.